React Quickstart

In this guide, you’ll create an embedded wallet including sign up with email, passkey, and social login for smart accounts, connect wallet for existing EOAs, and seamless transactions with gas sponsorship.

Alt text

Below you’ll find guides for:

  1. starting fresh with a new NextJS template
  2. integrating into an existing React project

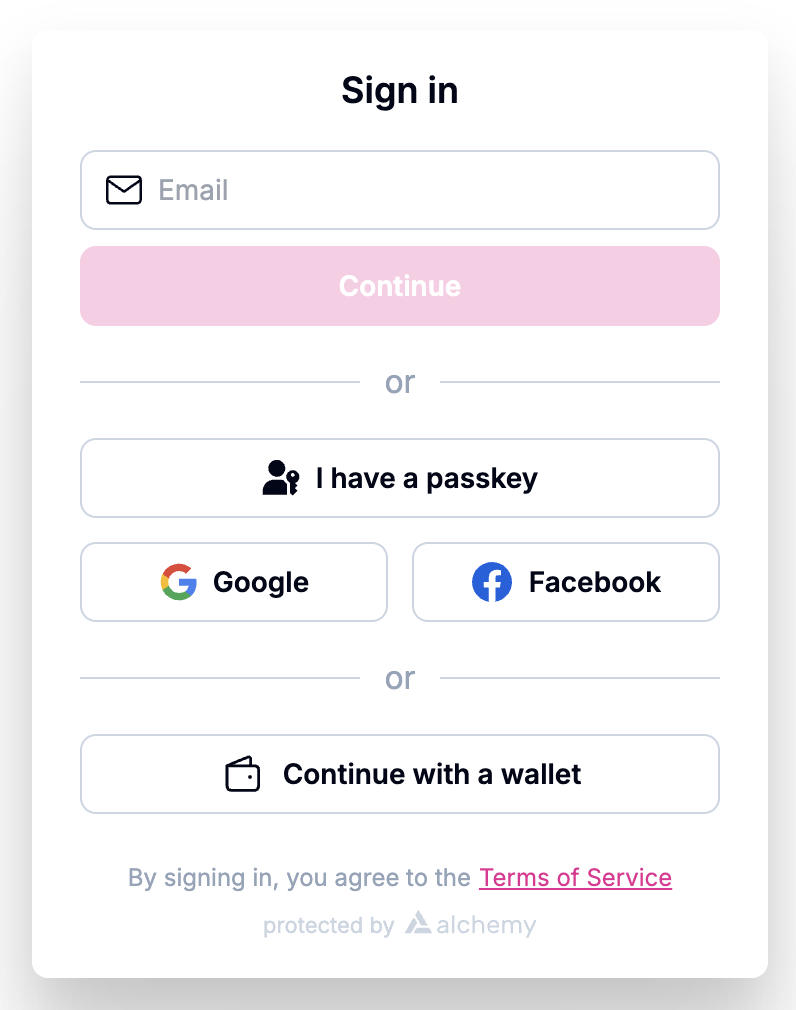
Check out what you can build using our Demo App.

New NextJS project

1. Create a new NextJS app using our template

For a simple end-to-end example, we will spin up a new NextJS app using our template.

$npx create-next-app my-smart-wallets-app -e https://github.com/alchemyplatform/smart-wallets-quickstart

2. Get your Alchemy API Key

  1. Get your API key by creating a new app in your Alchemy Dashboard

    Make sure Arbitrum Sepolia is enabled for your app under the Networks tab. The quickstart will demonstrate minting a NFT on Arbitrum Sepolia.

  2. Create a new account config in your Account Kit Dashboard

    1. Apply the config to your app from step 1

      apply your the config to the app from the first step
    2. Enable authentication methods you want to support.


      Email auth

      If you want to use email auth, toggle on email.

      • For testing, use http://localhost:3000 as the Redirect URL (Note http not https)
      • The user will be redirected to the Redirect URL if you use the magic link email flow
      • Optionally stylize ✨ the email with your brand color and logo!
      configure email auth
      Social auth

      If you want to enable social login, toggle which auth providers you want to support.

      • For testing, add http://localhost:3000 as a whitelisted origin

      • Add the link that your dapp will be running on to the whitelisted origin list

      • Optionally enter your own OAuth credentials or use our defaults

        configure social auth
  3. Create the config and copy the API Key

    how to copy the api key

…and add the API key to your .env file:

you can copy the .env.example file to .env and replace the ALCHEMY_API_KEY with your own.

$cp .env.example .env
.env
$NEXT_PUBLIC_ALCHEMY_API_KEY=your_api_key_here

3. Get your Alchemy paymaster policy ID

Set up a paymaster policy to sponsor gas for your smart wallets. If you want more information on how to set up a paymaster policy, see the Sponsor gas docs.

  1. Go to the Alchemy Dashboard
  2. Navigate to WalletsGas Manager
  3. In the Policies tab, click the “Create new policy +” button
  4. Fill out the steps to create a new policy. See the example inputs below:
    • Policy details
      • Name: Smart Wallets Policy
      • Policy type: Sponsor gas
      • Select chain type: EVM networks
      • App: Select your app from the dropdown
      • Select networks: Arbitrum Sepolia (required for the NFT minting example in this quickstart)
    • Spending rules
      • Select all the checkboxes to not set any limits
      • Select I don't want to set custom rules
    • Access Controls
      • Select None
    • Expiry and duration
      • Use the default values
  5. Review and publish the policy
  6. Copy the policy ID to your .env file
.env
$NEXT_PUBLIC_ALCHEMY_POLICY_ID=your_policy_id_here

4. Run the app!

That’s it! Run the NextJS app to see your new auth flow in action ✨

$npm run dev

Existing project

To integrate in to your existing dapp and better understand the above demo app, we will walk through the each of the steps required for using alchemy ui components in technical depth!

1. Install the packages

Prerequisites

Installation

Install the React and Infra packages from Account Kit along with tailwind for styling and react-query to support react components.

$yarn add @account-kit/infra @account-kit/react @tanstack/react-query
>yarn add -D tailwindcss @tailwindcss/postcss postcss

Tailwind Setup

If you don’t have tailwind setup yet, create a postcss.config.mjs file (if you don’t already have one) and add the @tailwindcss/postcss plugin.

postcss.config.mjs
1export default {
2 plugins: {
3 "@tailwindcss/postcss": {},
4 },
5};

The only thing left to do is to create a global.css file and import it in the root of your app.

global.css
1@import "tailwindcss";

For more on tailwind setup, see these steps.

Still using tailwind v3?

If you’re still using tailwind v3, don’t fret. Account Kit is still fully compatible. Just skip the above tailwind setup steps since you’ve already set it up.

2. Get your Alchemy API Key

See the steps above in the NextJS section to get your API key.

3. Configure your UI components

In this step, you’ll customize your authentication methods and UI styles.

The demo app provides an interactive sandbox to explore combinations. When you’re all done, click the ‘Code preview’ toggle to export your code! You’ll get two files:

  1. tailwind.config.ts
  2. config.ts

*Note: tailwind.config.ts and config.ts changes are required even if using default styling*

Customize styles and auth methods in the demo app

3a. Customize styling with tailwind

  1. In the demo app, copy your tailwind.config.ts code into a file of the same name in your project. This will apply your custom styles: colors, border radius, and illustrations.

    1. Logo: logo images are loaded client side for maximum performance, so you’ll need to add the image file to your project and specify the file path in the config where noted.
    2. Light/Dark mode:
      1. Light Mode and Dark Mode are set to match the system theme. You can manually override this by following this guide. TLDR: add @custom-variant dark (&:is(.dark, .dark *)); to your global.css file.

        (If you are still using tailwind v3, follow this guide instead. TLDR: update your tailwindcss config to use selector mode for dark and then add the dark class to the root of your DOM.)

    3. You can customize even more style properties
  2. If your tailwind.config.ts already contains any existing config information, be sure to wrap it with withAccountKitUi :

    tailwind.config.ts
    1import { withAccountKitUi } from "@account-kit/react/tailwind";
    2
    3export default withAccountKitUi(
    4 {
    5 // 1. (required) your existing tailwind config
    6 // If you are using tailwind v4, this will likely be empty.
    7 // If you're still using tailwind v3, this will contain things like content, theme, plugins, etc. - https://v3.tailwindcss.com/docs/installation/using-postcss
    8 },
    9 {
    10 // 2. (optional) overwrite AccountKit theme options
    11 },
    12);
  3. Update your global.css file to include your tailwind.config.ts. (Skip this step if you’re still using tailwind v3.)

global.css
1@import "tailwindcss";
2@config '../../tailwind.config.ts'; // [!code ++]

3b. Customize authentication methods

  1. In the root of your project, create a config.ts file

  2. In the demo app, copy your config.ts code into the file of the same name in your project. This will apply your authentication methods (email, passkey, etc.)

    • createConfig is used to initialize the alchemy provider in the next step. It requires 2 params:

      • props: for creating an Alchemy config. Notice the 4 params passed to props in our example:

        • apiKey (required): Copy-paste your Alchemy API key, from step 2. Note that for production this key should be protected by proxying to the backend and setting rpcUrl instead
        • chain (required): Chain imported from @account-kit/infra . This chain must match the chain your api key / embedded accounts config is setup for.
        • ssr (optional): Highly recommended for NextJs applications to keep account state consistent between the server and client
        • storage (optional): Cookie storage highly recommended for NextJs applications to persist and cache account state across page loads
        • enablePopupOauth (optional): If implementing social login, allow for the sign in window to appear as a pop up to your user.
        • sessionConfig (optional): Used to configure the session duration
      • ui: for creating Alchemy Accounts UI components

      • See here for full details on the ui config params including authentication options

  3. Make sure to export your config and queryClient:

Remember to paste in your API Key from step 2

import { 
const createConfig: (props: CreateConfigProps, ui?: AlchemyAccountsUIConfig) => AlchemyAccountsConfigWithUI

Wraps the createConfig that is exported from @aa-sdk/core to allow passing an additional argument, the configuration object for the Auth Components UI (the modal and AuthCard).

createConfig
,
const cookieStorage: (config?: { sessionLength?: number; domain?: string; }) => Storage

Function to create cookie based Storage

cookieStorage
} from "@account-kit/react";
import {
class QueryClient
QueryClient
} from "@tanstack/react-query";
import {
const arbitrumSepolia: Chain
arbitrumSepolia
} from "@account-kit/infra";
export const
const config: AlchemyAccountsConfigWithUI
config
=
function createConfig(props: CreateConfigProps, ui?: AlchemyAccountsUIConfig): AlchemyAccountsConfigWithUI

Wraps the createConfig that is exported from @aa-sdk/core to allow passing an additional argument, the configuration object for the Auth Components UI (the modal and AuthCard).

createConfig
(
{ // alchemy config
transport: any
transport
:
any
alchemy
({
apiKey: string
apiKey
: "your_api_key" }), // TODO: add your Alchemy API key - setup your app and embedded account config in the alchemy dashboard (https://dashboard.alchemy.com/accounts)
chain: Chain
chain
:
const arbitrumSepolia: Chain
arbitrumSepolia
, // TODO: specify your preferred chain here and update imports from @account-kit/infra
ssr?: boolean | undefined

Enable this parameter if you are using the config in an SSR setting (eg. NextJS) Turing this setting on will disable automatic hydration of the client store

ssr
: true, // Defers hydration of the account state to the client after the initial mount solving any inconsistencies between server and client state (read more here: https://www.alchemy.com/docs/wallets/react/ssr)
storage?: CreateStorageFn | undefined
storage
:
const cookieStorage: (config?: { sessionLength?: number; domain?: string; }) => Storage

Function to create cookie based Storage

cookieStorage
, // persist the account state using cookies (read more here: https://www.alchemy.com/docs/wallets/react/ssr#persisting-the-account-state)
enablePopupOauth: true
enablePopupOauth
: true, // must be set to "true" if you plan on using popup rather than redirect in the social login flow
// optional config to override default session manager config
sessionConfig?: ({ storage?: Storage | "localStorage" | "sessionStorage" | undefined; sessionKey?: string | undefined; expirationTimeMs?: number | undefined; } & { domain?: string; }) | undefined
sessionConfig
: {
expirationTimeMs?: number | undefined
expirationTimeMs
: 1000 * 60 * 60, // 60 minutes (default is 15 min)
}, }, { // authentication ui config - your customizations here
auth?: { addPasskeyOnSignup?: boolean; header?: React.ReactNode; hideError?: boolean; onAuthSuccess?: () => void; sections: AuthType[][]; hideSignInText?: boolean; } | undefined
auth
: {
sections: AuthType[][]

Each section can contain multiple auth types which will be grouped together and separated by an OR divider

sections
: [
[{
type: "email"
type
: "email" }],
[ {
type: "passkey"
type
: "passkey" },
{
type: "social"
type
: "social",
authProviderId: KnownAuthProvider
authProviderId
: "google",
mode: "popup"
mode
: "popup" },
{
type: "social"
type
: "social",
authProviderId: KnownAuthProvider
authProviderId
: "facebook",
mode: "popup"
mode
: "popup" },
], [ {
type: "external_wallets"
type
: "external_wallets",
walletConnect?: { isNewChainsStale?: boolean | undefined; client?: SignClient | undefined; storage?: IKeyValueStorage | undefined; projectId: string; metadata?: Metadata | undefined; ... 13 more ...; showQrModal?: boolean | undefined; } | undefined
walletConnect
: {
projectId: string
projectId
: "your-project-id" },
}, ], ],
addPasskeyOnSignup?: boolean | undefined

If this is true, then auth components will prompt users to add a passkey after signing in for the first time

addPasskeyOnSignup
: true,
showSignInText: boolean
showSignInText
: true,
}, }, ); export const
const queryClient: QueryClient
queryClient
= new
new QueryClient(config?: QueryClientConfig): QueryClient
QueryClient
();

4. Set up the Alchemy Provider

This example assumes you are using the NextJS app router.

However, the key pieces are applicable to any React app and you can structure the location of the code as needed.

4a. Create the provider - app/providers.tsx

Once you have styling and authentication configs, create a providers.tsx file and import the AlchemyAccountProvider.

The QueryClientProvider is also required to handle React Queries within the Alchemy Account Provider.

app/providers.tsx
1"use client";
2import { config, queryClient } from "@/config";
3import { AlchemyClientState } from "@account-kit/core";
4import { AlchemyAccountProvider } from "@account-kit/react";
5import { QueryClientProvider } from "@tanstack/react-query";
6import { PropsWithChildren } from "react";
7
8export const Providers = (
9 props: PropsWithChildren<{ initialState?: AlchemyClientState }>,
10) => {
11 return (
12 <QueryClientProvider client={queryClient}>
13 <AlchemyAccountProvider
14 config={config}
15 queryClient={queryClient}
16 initialState={props.initialState}
17 >
18 {props.children}
19 </AlchemyAccountProvider>
20 </QueryClientProvider>
21 );
22};

4b. Use the provider - layout.tsx

Any component or page that will use Alchemy React components, must be wrapped by this Provider.

Additionally, we recommend using cookies to set the initial state when creating the provider to persist state across reloads (🧠 remember the cookie storage configured in step 3b).

For example, wrap your app with the created Provider by modifying your layout.tsx file.

app/layout.tsx
1import { config } from "@/config";
2import { cookieToInitialState } from "@account-kit/core";
3import type { Metadata } from "next";
4import { Inter } from "next/font/google";
5import { headers } from "next/headers";
6import "./globals.css";
7import { Providers } from "./providers";
8
9const inter = Inter({ subsets: ["latin"] });
10
11export const metadata: Metadata = {
12 title: "Embedded Accounts UI Components Quickstart NextJs Template",
13 description: "Embedded Accounts UI Components Quickstart NextJs Template",
14};
15
16export default function RootLayout({
17 children,
18}: Readonly<{
19 children: React.ReactNode;
20}>) {
21 // This will allow us to persist state across page boundaries (read more here: https://www.alchemy.com/docs/wallets/react/ssr#persisting-the-account-state)
22 const initialState = cookieToInitialState(
23 config,
24 headers().get("cookie") ?? undefined,
25 );
26
27 return (
28 <html lang="en">
29 <body className={inter.className}>
30 <Providers initialState={initialState}>{children}</Providers>
31 </body>
32 </html>
33 );
34}

5. Run it

Once you have wrapped your app with the Alchemy Provider, you can now use the pre-built Alchemy react components for auth throughout your app.

All you need to do is useAuthModal! For example, pop open the auth modal like so:

app/page.tsx
1"use client";
2import {
3 useAuthModal,
4 useLogout,
5 useSignerStatus,
6 useUser,
7} from "@account-kit/react";
8
9export default function Home() {
10 const user = useUser();
11 const { openAuthModal } = useAuthModal();
12 const signerStatus = useSignerStatus();
13 const { logout } = useLogout();
14
15 return (
16 <main className="flex min-h-screen flex-col items-center p-24 gap-4 justify-center text-center">
17 {signerStatus.isInitializing ? (
18 <>Loading...</>
19 ) : user ? (
20 <div className="flex flex-col gap-2 p-2">
21 <p className="text-xl font-bold">Success!</p>
22 You're logged in as {user.email ?? "anon"}.
23 <button
24 className="akui-btn akui-btn-primary mt-6"
25 onClick={() => logout()}
26 >
27 Log out
28 </button>
29 </div>
30 ) : (
31 <button className="akui-btn akui-btn-primary" onClick={openAuthModal}>
32 Login
33 </button>
34 )}
35 </main>
36 );
37}