Part 1: How to Create an NFT Game Smart Contract

Learn how to create a contract that powers an on-chain NFT game similar to CryptoKitties and Axie Infinity

Gaming has become one of the most popular applications of NFTs. Since 2021, there have been multiple games that have witnessed millions of dollars worth of transactions.

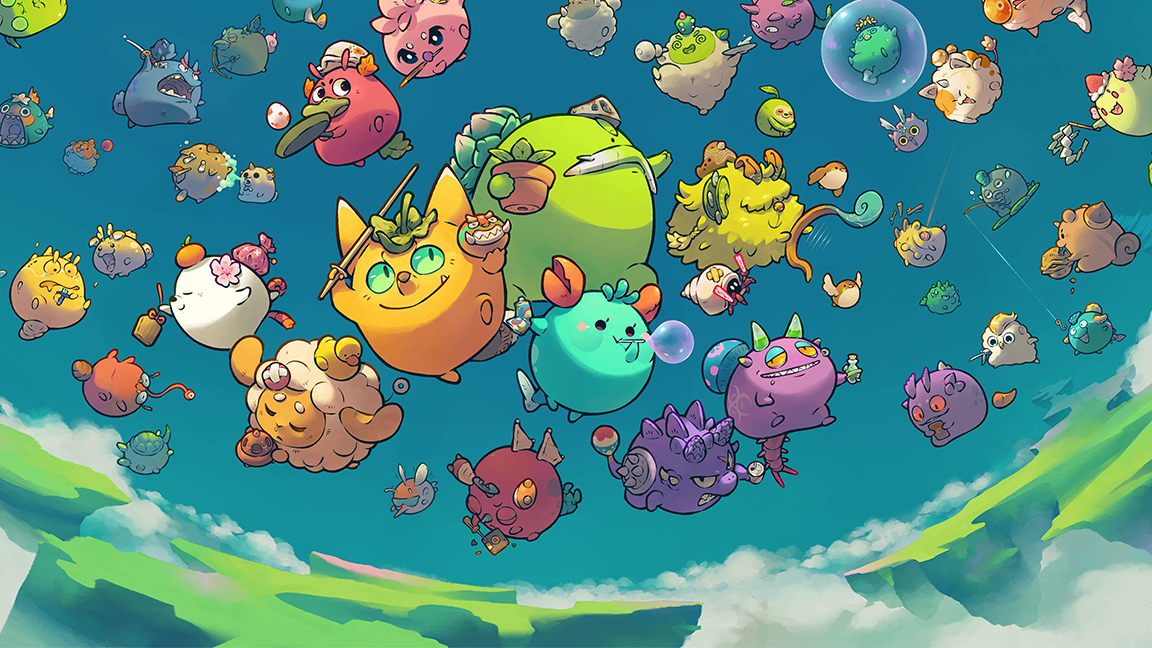
NFTs have been used in pet collectible games like Cryptokitties, Pokemon style monster battling games like Axie Infinity and fantasy trading card games like Sorare. These games have been the closest thing to mainstream adoption of NFTs.
1152

Axie Infinity, a popular Pokemon-style monster battling game

In this two part series, we will build a Cryptokitties-style breeding game from scratch. This tutorial will focus on writing a smart contract that will power our game on-chain. The next part will focus on building a frontend using Next.js that interfaces with the aforementioned contract.


About the Game

As stated above, the game will implement breeding mechanics seen in games like Cryptokitties. Users will be able to do the following:

  1. Mint a genesis monster by paying some ETH.
  2. Breed a new monster using any two existing monsters that they own (genesis or otherwise)
  3. View all their monsters on a dapp

We will call our monsters Alchemons. In the subsequent parts of this tutorial, we will write an ERC-721 smart contract that allows users to mint genesis Alchemons and breed new Alchemons into existence.


Creating the NFT Game Smart Contract

Step 1: Create an Alchemy app

We’re going to deploy and test our contract on the Goerli testnet. In order to do this, we will require a free Alchemy account.

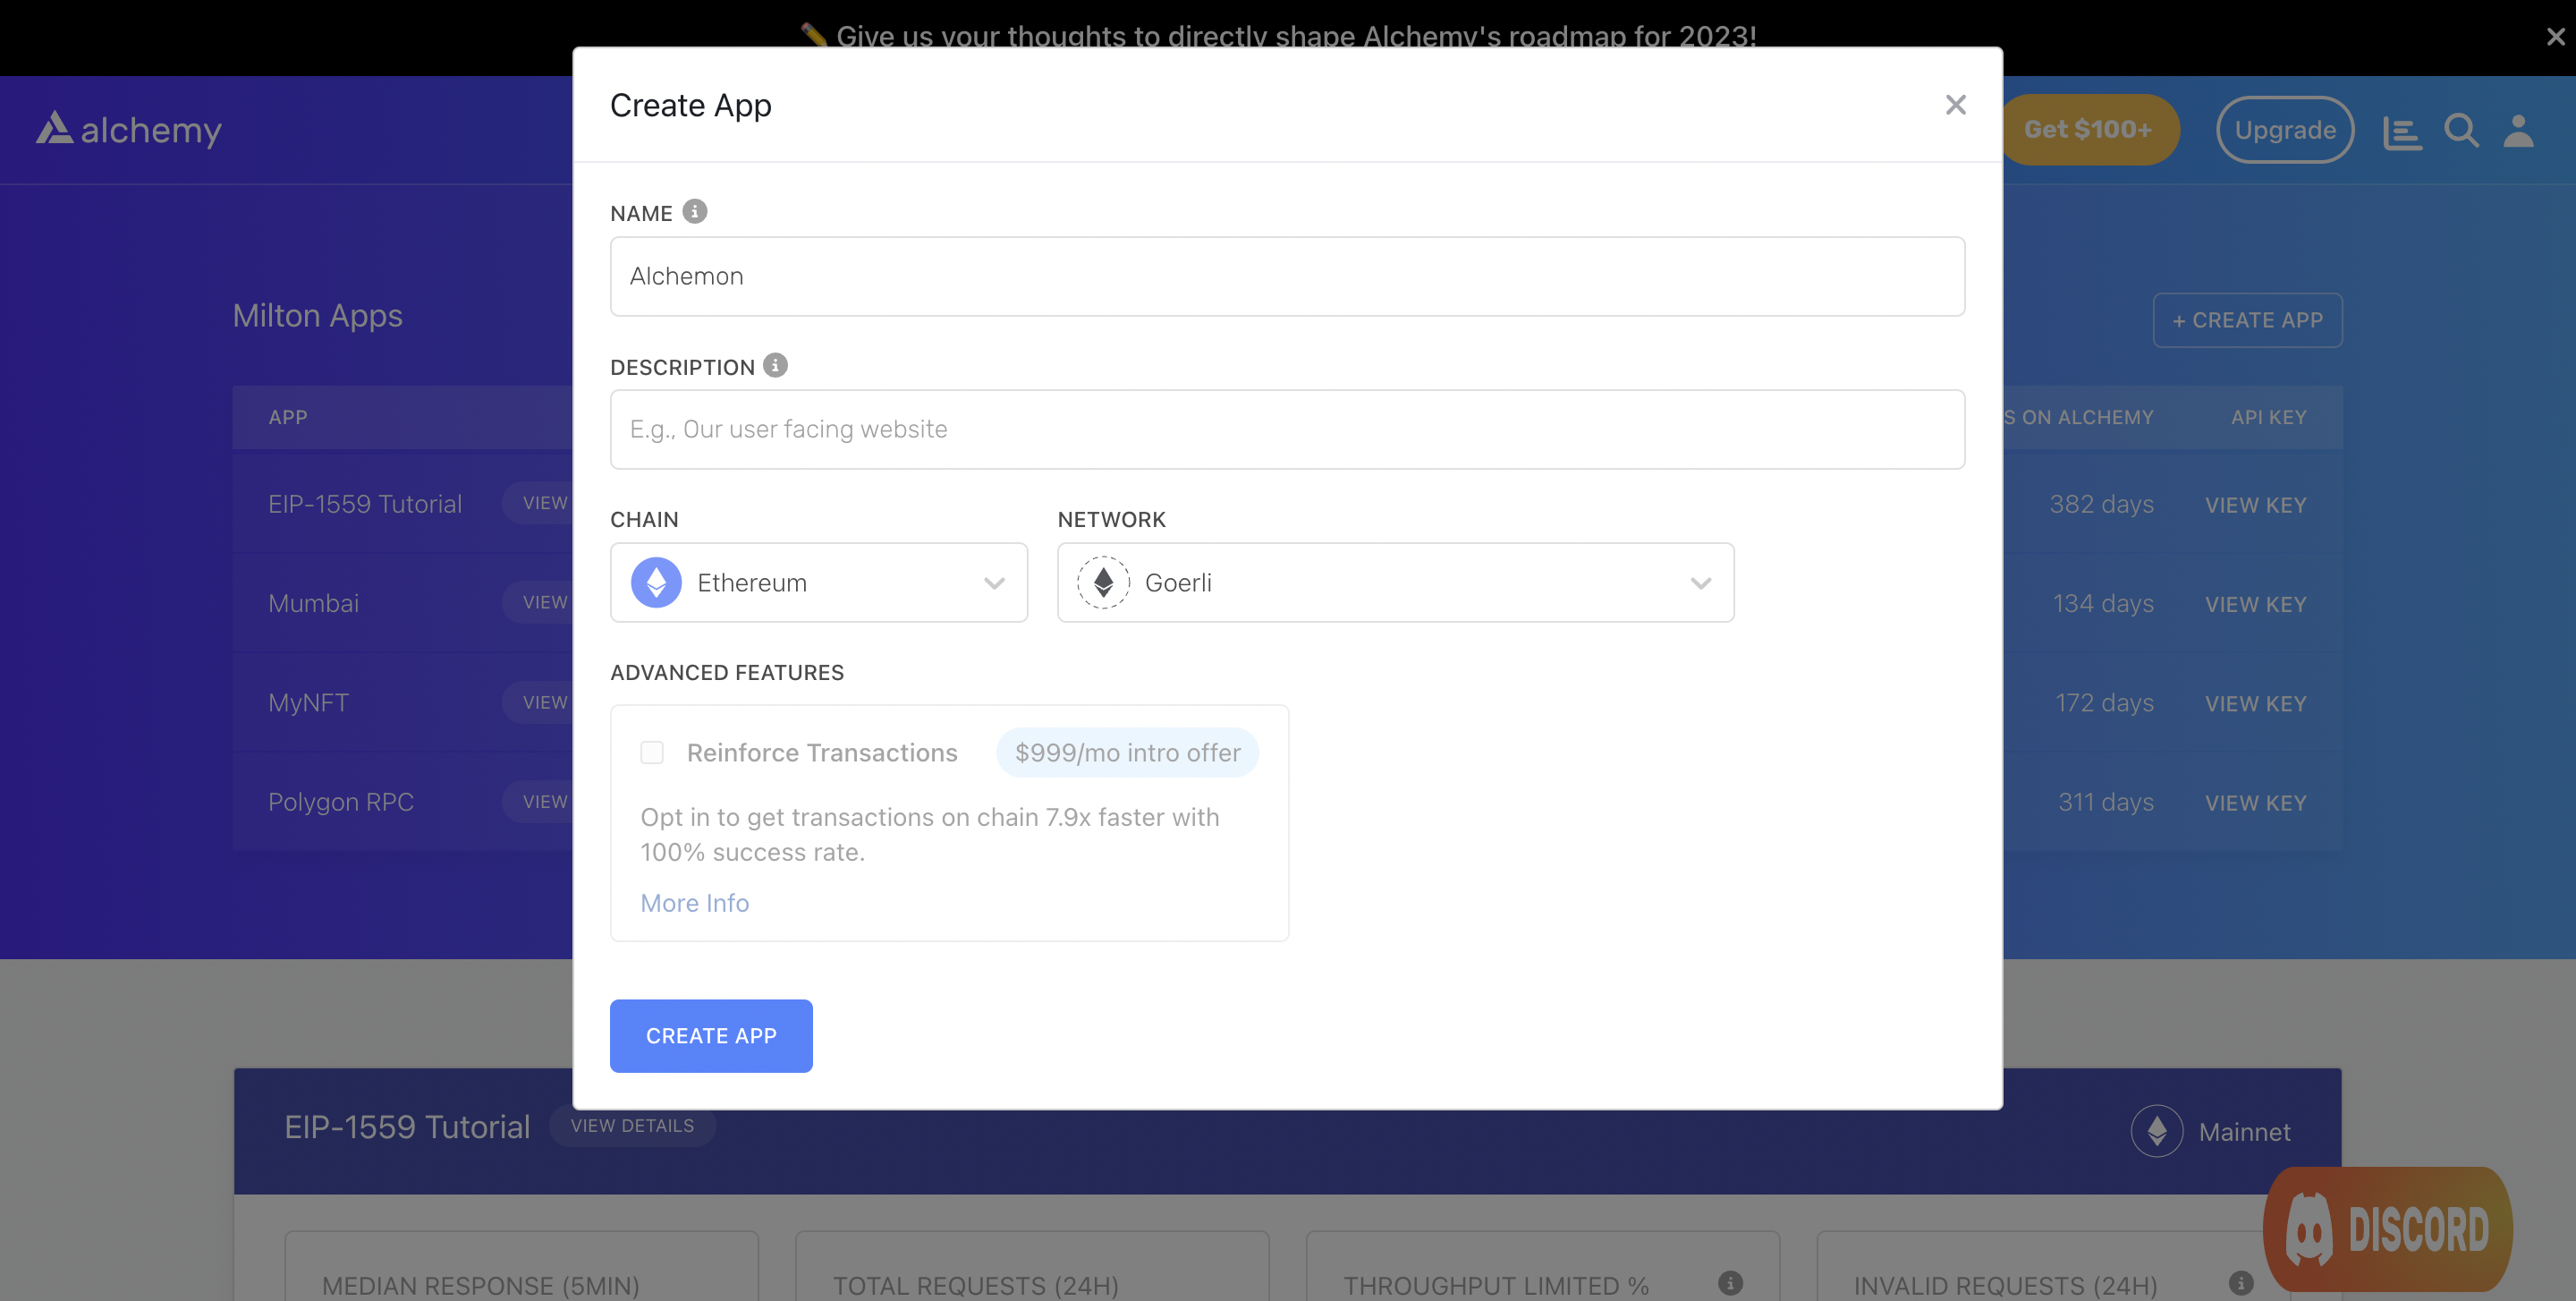
Create an Alchemy app by following these steps:

  1. From Alchemy’s dashboard, hover over the Apps drop-down menu and choose Create App.
  2. Provide a Name and Description for your app. For Chain, select Ethereum and for Network select Goerli.
  3. Click the Create App button.

2880

Creating an app on the Alchemy Dashboard

Once you have created your app, click on your app’s View Key button in the dashboard and save the HTTP URL. We will use this later.

Step 2: Install Node and npm

In case you haven’t already, install node and npm on your local machine.

Make sure that node is at least v14 or higher by typing the following in your terminal:

shell
$node -v

Step 3: Create a Hardhat project

We’re going to set up our project using Hardhat, the industry-standard development environment for Ethereum smart contracts. Additionally, we’ll also install OpenZeppelin contracts.

To set up Hardhat, run the following commands in your terminal:

shell
$mkdir alchemon && cd alchemon
>npm init -y
>npm install --save-dev hardhat
>npx hardhat

Choose Create a Javascript project from the menu and accept all defaults. To ensure everything is installed correctly, run the following command in your terminal:

shell
$npx hardhat test

To install OpenZeppelin:

shell
$npm install @openzeppelin/contracts

Step 4: Write the smart contract

Let’s now write a smart contract that implements our on-chain game. To do this, we need to broadly implement three things:

  1. A mintGenesis function that allows users to mint genesis (or generation 0) NFTs by paying a certain amount of ETH.
  2. A breed function that allows users to use any two of their NFTs to breed a new NFT.
  3. A generateMetadata function that generates metadata that will be stored on-chain.

Open the project in your favorite code editor (e.g., VS Code), and create a new file called AlchemonNft.sol in the contracts folder. Add the following code to this file:

AlchemonNft.sol
1// SPDX-License-Identifier: MIT
2pragma solidity ^0.8.9;
3
4import "@openzeppelin/contracts/token/ERC721/ERC721.sol";
5import "@openzeppelin/contracts/token/ERC721/extensions/ERC721Enumerable.sol";
6import "@openzeppelin/contracts/token/ERC721/extensions/ERC721URIStorage.sol";
7import "@openzeppelin/contracts/access/Ownable.sol";
8import "@openzeppelin/contracts/utils/Counters.sol";
9import "@openzeppelin/contracts/utils/Base64.sol";
10import "@openzeppelin/contracts/utils/Strings.sol";
11
12contract AlchemonNft is ERC721, ERC721Enumerable, ERC721URIStorage, Ownable {
13 using Counters for Counters.Counter;
14
15 Counters.Counter private _tokenIds;
16
17 // Set price for the genesis NFTs
18 uint public constant PRICE = 0.0005 ether;
19
20 constructor() ERC721("Alchemon", "Alch") {}
21
22 // Mint Genesis NFTs
23 function mintGenesis(uint _count) public payable {
24 require(msg.value >= PRICE, "Not enough ether to purchase genesis NFT.");
25
26 // Genesis NFTs are generation 0
27 for (uint i = 0; i < _count; i++) {
28 string memory metadata = generateMetadata(_tokenIds.current(), 0);
29 _mintSingleNft(metadata);
30 }
31
32 }
33
34 // Generate NFT metadata
35 function generateMetadata(uint tokenId, uint generation) public pure returns (string memory) {
36 string memory svg = string(abi.encodePacked(
37 "<svg xmlns='http://www.w3.org/2000/svg' preserveAspectRatio='xMinyMin meet' viewBox='0 0 350 350'>",
38 "<style>.base { fill: white; font-family: serif; font-size: 25px; }</style>",
39 "<rect width='100%' height='100%' fill='blue' />",
40 "<text x='50%' y='40%' class='base' dominant-baseline='middle' text-anchor='middle'>",
41 "<tspan y='40%' x='50%'>Alchemon #",
42 Strings.toString(tokenId),
43 "</tspan>",
44 "<tspan y='50%' x='50%'>Generation ",
45 Strings.toString(generation),
46 "</tspan></text></svg>"
47 ));
48
49 string memory json = Base64.encode(
50 bytes(
51 string(
52 abi.encodePacked(
53 '{"name": "Alchemon #',
54 Strings.toString(tokenId),
55 '", "description": "An in-game monster", "image": "data:image/svg+xml;base64,',
56 Base64.encode(bytes(svg)),
57 '", "attributes": [{"trait_type": "Generation", "value": "',
58 Strings.toString(generation),
59 '"}]}'
60 )
61 )
62 )
63 );
64
65 string memory metadata = string(
66 abi.encodePacked("data:application/json;base64,", json)
67 );
68
69 return metadata;
70 }
71
72 // Breed a new NFT
73 function breed(uint parent1Id, uint parent2Id) public {
74 require(parent1Id != parent2Id, "Parents must be different");
75 require(ownerOf(parent1Id) == msg.sender && ownerOf(parent2Id) == msg.sender, "Sender doesn't own NFTs");
76
77 // Get generations of each parent and compute new generation
78 // New Generation = Max(Parent 1, Parent 2) + 1
79 uint newGen;
80
81 if (parent1Id >= parent2Id) {
82 newGen = parent1Id + 1;
83 } else {
84 newGen = parent2Id + 1;
85 }
86
87 // Generate metadata
88 string memory metadata = generateMetadata(_tokenIds.current(), newGen);
89
90 // Mint offspring
91 _mintSingleNft(metadata);
92 }
93
94 // Mint a single NFT with on-chain metadata
95 function _mintSingleNft(string memory _tokenURI) private {
96 uint newTokenID = _tokenIds.current();
97 _safeMint(msg.sender, newTokenID);
98 _setTokenURI(newTokenID, _tokenURI);
99 _tokenIds.increment();
100 }
101
102 // Get tokens of an owner
103 function tokensOfOwner(address _owner) external view returns (uint[] memory) {
104
105 uint tokenCount = balanceOf(_owner);
106 uint[] memory tokensId = new uint256[](tokenCount);
107
108 for (uint i = 0; i < tokenCount; i++) {
109 tokensId[i] = tokenOfOwnerByIndex(_owner, i);
110 }
111 return tokensId;
112 }
113
114 // Withdraw ether
115 function withdraw() public payable onlyOwner {
116 uint balance = address(this).balance;
117 require(balance > 0, "No ether left to withdraw");
118
119 (bool success, ) = (msg.sender).call{value: balance}("");
120 require(success, "Transfer failed.");
121 }
122
123 // The following functions are overrides required by Solidity.
124
125 function _beforeTokenTransfer(address from, address to, uint256 tokenId, uint256 batchSize)
126 internal
127 override(ERC721, ERC721Enumerable)
128 {
129 super._beforeTokenTransfer(from, to, tokenId, batchSize);
130 }
131
132 function _burn(uint256 tokenId) internal override(ERC721, ERC721URIStorage) {
133 super._burn(tokenId);
134 }
135
136 function tokenURI(uint256 tokenId)
137 public
138 view
139 override(ERC721, ERC721URIStorage)
140 returns (string memory)
141 {
142 return super.tokenURI(tokenId);
143 }
144
145 function supportsInterface(bytes4 interfaceId)
146 public
147 view
148 override(ERC721, ERC721Enumerable)
149 returns (bool)
150 {
151 return super.supportsInterface(interfaceId);
152 }
153}

Compile the contract and make sure everything works by running:

shell
$npx hardhat compile

Step 5: Install MetaMask and get ETH from the Alchemy faucet

Next, let’s set up a MetaMask wallet. You can download the wallet extension for your browser here. MetaMask comes configured with the Goerli network by default, and you can switch to this once your wallet is set up.

In order to deploy our contract, mint NFTs, and pay for the genesis pieces, we will require some test goerliETH. You can obtain this for free from Alchemy’s Goerli faucet.

Depending on demand, you may be required to sign with your Alchemy account.

Step 6: Configure hardhat.config.js

Once we have a wallet set up with some test ETH, we can proceed to configure hardhat so that it deploys our contract to Goerli. Replace the contents of hardhat.config.js with the following:

hardhat.config.js
1require("@nomicfoundation/hardhat-toolbox");
2
3/** @type import('hardhat/config').HardhatUserConfig */
4module.exports = {
5 solidity: "0.8.17",
6 networks: {
7 goerli: {
8 url: '<-- ALCHEMY APP HTTP URL -->',
9 accounts: ['<-- METAMASK WALLET PRIVATE KEY -->']
10 }
11 }
12};

Make sure you do not make your HTTP URL or wallet private key public.

Step 7: Write the contract deployment script

We are now in a good position to write a script that allows us to do the following:

  1. Deploy the Alchemon contract to the Goerli testnet.
  2. Mint 2 Genesis NFTs by paying 0.001 ETH.
  3. Breed a new NFT using the Genesis NFTs minted in step 2.

In the scripts folder, replace the contents of deploy.js with the following:

deploy.js
1const hre = require("hardhat");
2const ethers = require("ethers");
3
4async function main() {
5
6 // Deploy the Alchemon contract
7 const contractFactory = await hre.ethers.getContractFactory('AlchemonNft');
8 const alchContract = await contractFactory.deploy();
9 await alchContract.deployed();
10
11 console.log("Contract deployed to:", alchContract.address);
12
13 // Mint 2 genesis NFTs
14 let txn;
15 txn = await alchContract.mintGenesis(2, { value: ethers.utils.parseEther('0.001') });
16 await txn.wait();
17 console.log("2 NFTs minted");
18
19 // Breed genesis NFTs
20 txn = await alchContract.breed(0, 1);
21 await txn.wait();
22 console.log("1 NFT bred");
23
24}
25
26const runMain = async () => {
27 try {
28 await main();
29 process.exit(0);
30 } catch (e) {
31 console.log(e);
32 process.exit(1);
33 }
34}
35
36runMain();

Run this script by running the following command in your terminal:

shell
$npx hardhat run scripts/deploy.js --network goerli

If all goes well, you should see output that looks something like this:

$Contract deployed to: 0xDDd5bBAFd1F4318277446e17C9ebDcD079977d0C
>2 NFTs minted
>1 NFT bred

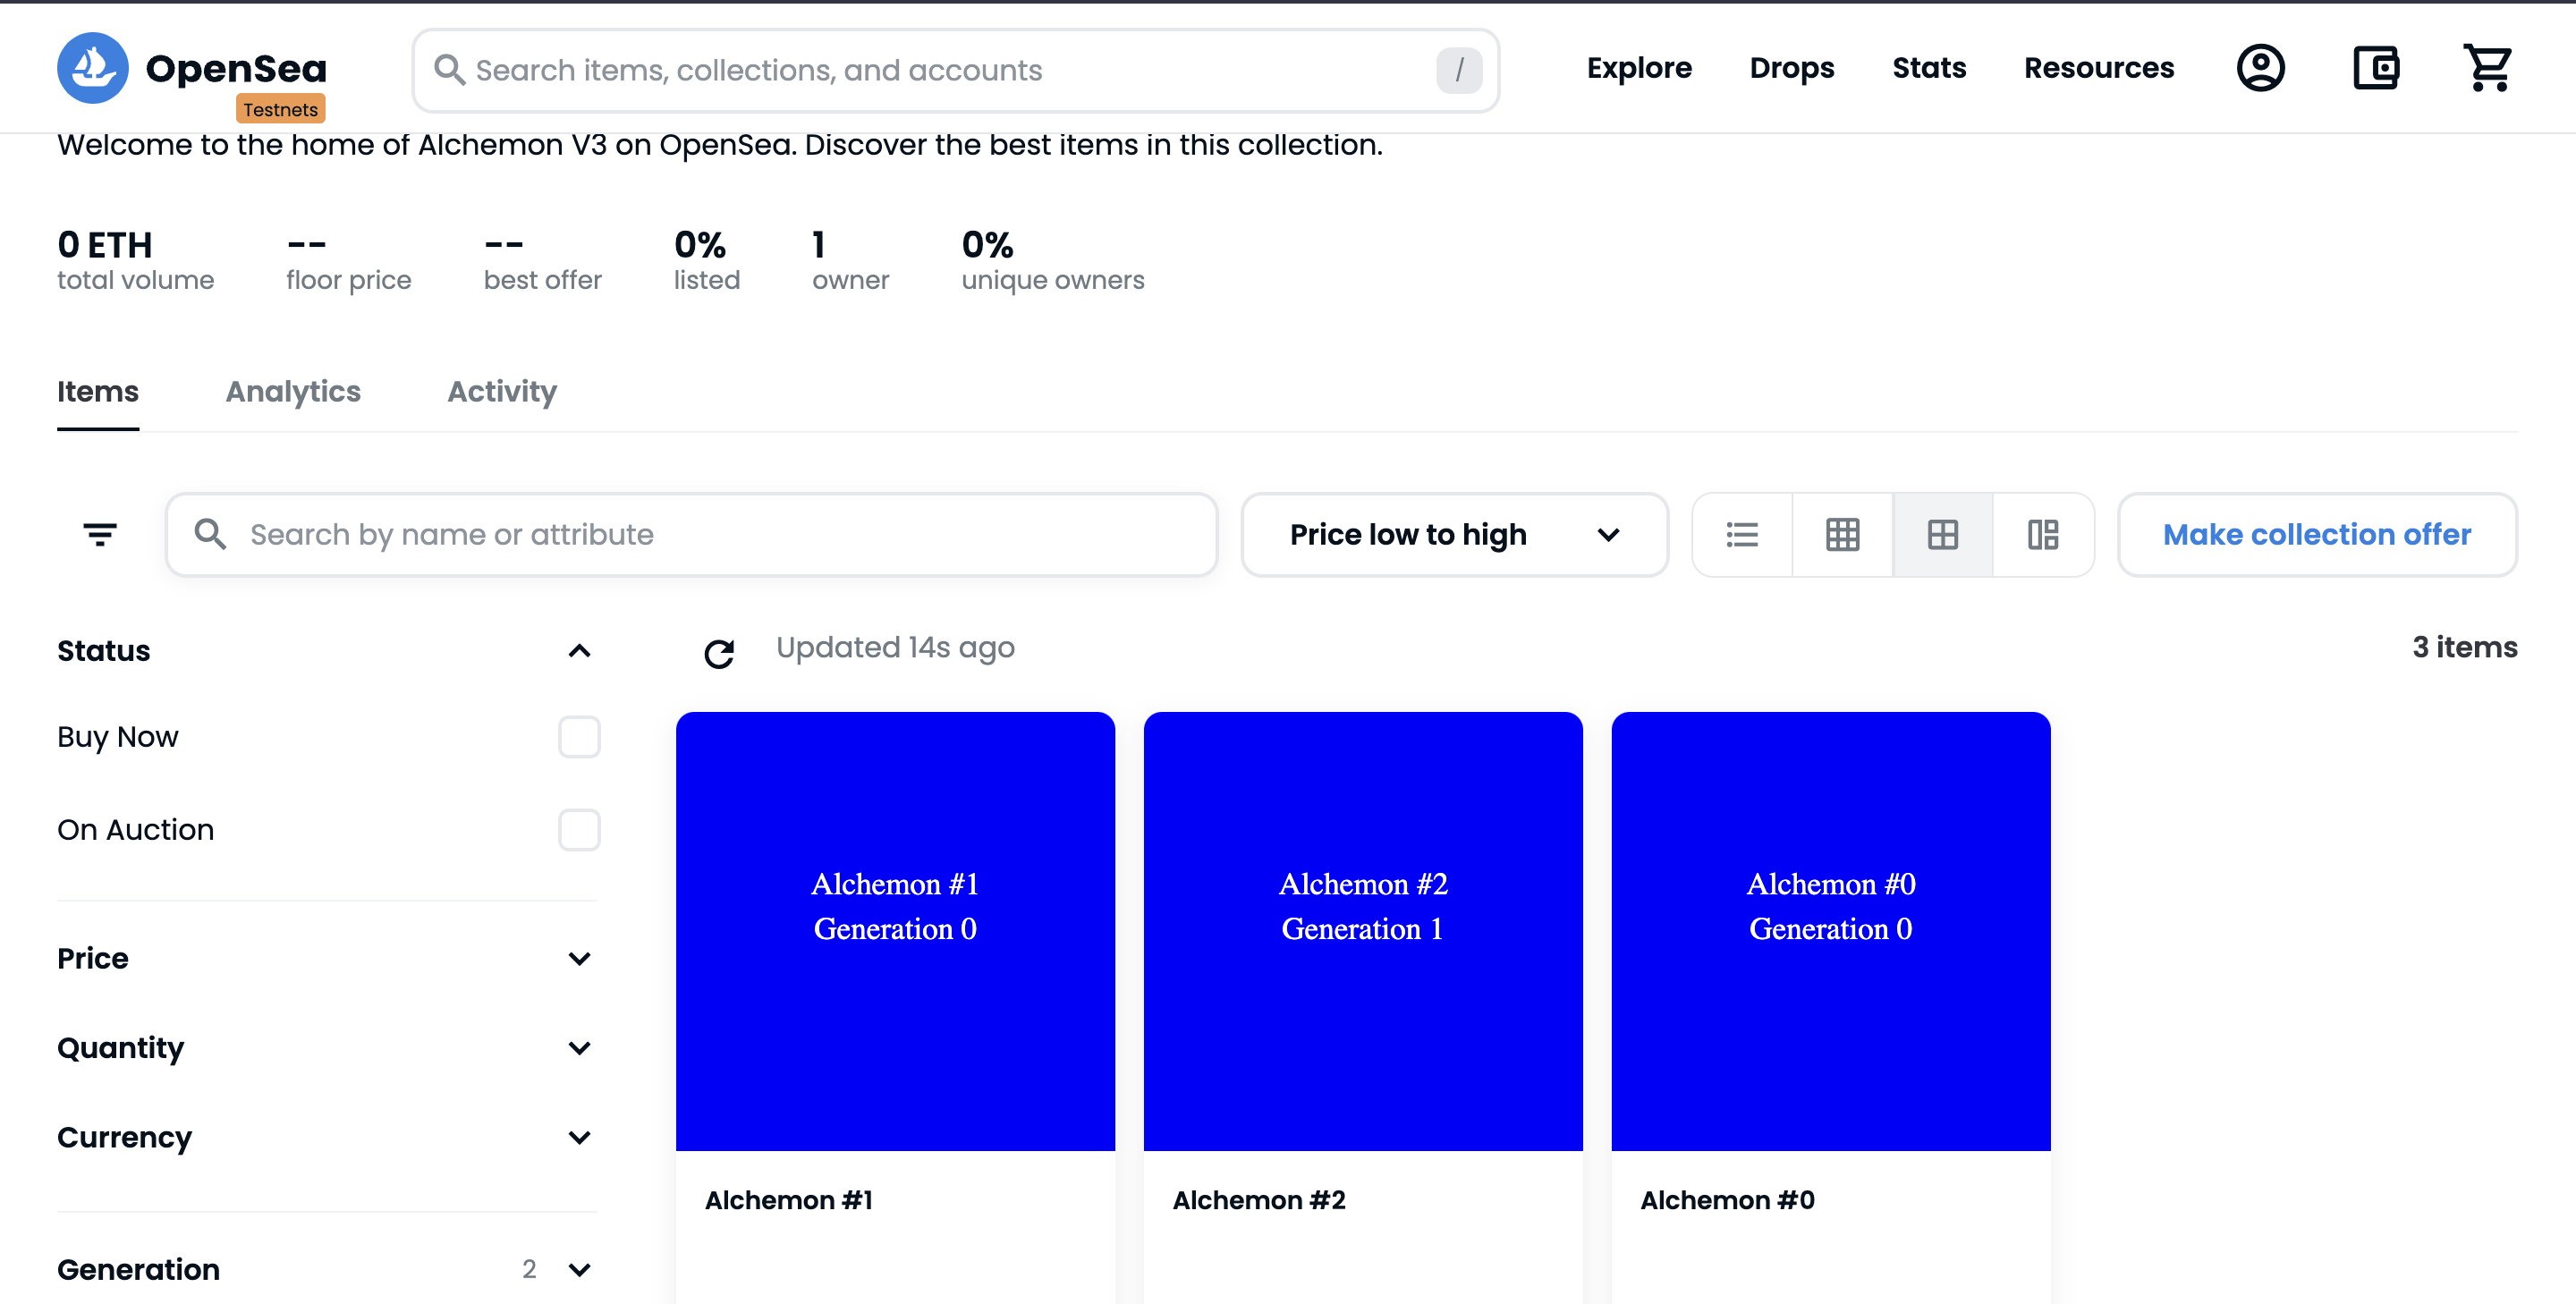
You can check out your new NFTs by searching your contract address in testnets.opensea.io.
2880

Alchemon NFT page on OpenSea

Conclusion

Congratulations! You now know how to create a contract that implements an on-chain breeding game. In the next tutorial Part 2: How to create an NFT game frontend, we will build a frontend that will allow users to breed their NFTs from an easy-to-use interface.

If you enjoyed this tutorial about creating NFT games, tweet us at @Alchemy and give us a shoutout!

Don’t forget to join our Discord server to meet other blockchain devs, builders, and entrepreneurs!

Ready to start building your NFT game?

Create a free Alchemy account and do share your project with us!


What’s Next