
How to start developing on zkSync (2025)
Written by Petar Todorov
Matter Labs now has a representative in the race against Scroll and Polygon to run the world's first zero-knowledge EVM – zkSync Era.
Launched in March 2023, zkSync Era is an EVM-compatible ZK Rollup that utilizes zero-knowledge proofs to scale the speed and processing power of the Ethereum network.
Developing on zkSync has the benefits of low gas fees for ETH and ERC20 tokens, as well as atomic swaps, limit orders, and native Layer-2 NFT support.
This article will explain what zkSync Era is and how to deploy a smart contract on the zkSync public testnet in five steps.
What is zkSync era?
zkSync Era is a new Layer-2 solution by Matter Labs that combines ZK-Proofs and Ethereum Virtual Machine technology to scale the throughout of the Ethereum mainnet. Merging both technologies, zkSync Era allows faster and more secure Ethereum transactions.
In addition to full EVM equivalence, Era introducesthe concept of account abstraction to the Ethereum stack, initially proposed in EIP-4337.
With account abstraction, wallets become smart contracts that can have features such as a custom signing algorithm, sponsored transactions, and 2-factor authentication.
How to start developing on zkSync era
Development on zkSync Era largely involves the same tools a web3 developed would use to deploy a contract on Ethereum. This tutorial will cover how to deploy a smart contract on the zkSync public testnet.
Prerequisites
For the tutorial, the following is needed:
- Private key of an Ethereum wallet
- Test ether
- Hardhat Integrated Development Environment (IDE) with the required plugins
- A package manager (NPM or Yarn)
- VScode
- Basic understanding of Typescript
1. Set up an IDE for zkSync era
Firstly, create a folder for the project.
Open VScode (or your machine’s terminal) and type:
Then, initialize npm with the command: npm init -y
The -y flag saves time by pre-filling all the input fields of the package.json file with their default values.
Now that npm and the project’s folder are all set up, install the required dependencies.
In the VScode terminal, type:
Here is the breakdown of the command:
- $ npm i -D: An alias for the install command. The -D flag saves all the packages as developer dependencies.
- $ typescript ts-node: installation of Typescript and the Typescript execution engine for Node.js.
- $ ethers@^5.7.2 zksync-web3@^0.13.1: Two libraries that help deploy and interact with the contract.
- $ hardhat: The IDE in use.
- $ @matterlabs/hardhat-zksync-solc @matterlabs/hardhat-zksync-deploy: Two Hardhat plugins that help compile and deploy the smart contract.
Next comes the initialization of the Hardhat project.
In the terminal, type:
npx hardhat init
Select ‘Create a TypeScript Project’ and press enter to pre-fill the next fields with their default values.
This is how the project’s folder structure should look:
In the contracts folder, delete the Lock.sol contract, which is automatically generated out of the box as it would not be needed.
The last step of the IDE setup is to head over to hardhat.config.ts file.
The hardhat.config.ts file is the ‘command center’ that defines these parameters for deployment:
- zkSync compiler version
- Chain on which the contract will be deployed
- Version of the Solidity compiler in which the contract will be written.
Delete the contents of the hardhat.config.ts file and replace them with the following:
The IDE setup is now ready and the next step is creating the smart contract.
2. Create the smart contract
The contract that will register the name and age of a person.
Head over to the contacts folder in the project’s directory and create a new file called Registry.sol
Next, copy and paste the following smart contract code into the file:
The contract must be compiled prior to deployment. In the terminal, type:
npx hardhat compile
3. Set up a wallet for zkSync era
The creation of a new wallet is not needed as zkSync Era supports existing Ethereum wallets.
Therefore, any existing wallets like Metamask can be used.
Note: It is not recommended to use a personal Ethereum wallet that stores investments or savings, as the deployment procedure requires exporting the private key.
4. Get test Goerli ETH and bridge to zkSync era
Test ether on the zkSync Era testnet can be required in order to deploy the contract.
To get some test ether, bridge Goerli ETH from the deployer wallet to its instance on zkSync Era.
-
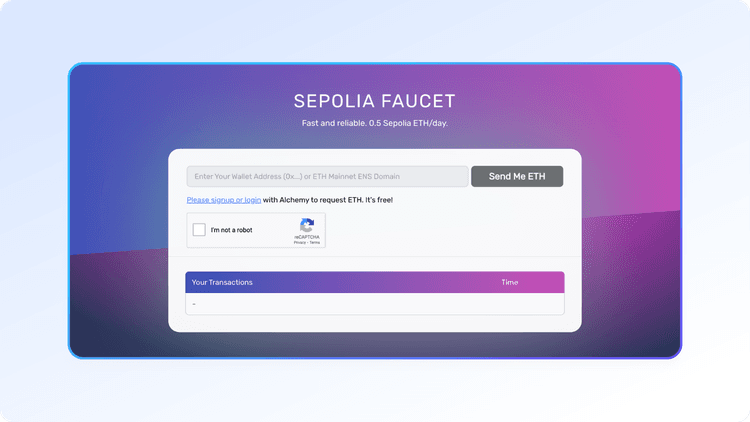
To do this, navigate to Alchemy’s Goerli faucet to get ether on the Goerli testnet.
-
Create a free Alchemy account before you proceed.
-
Then, open Metamask and click on the wallet address to copy it.
-
On the Goerli faucet website, paste the wallet address, and click Send Me ETH.
Next, go to zkSync Era’s bridge.
Click on “Connect via a browser wallet Metamask”.
Select the wallet which will be used for the contract deployment.
Click on MAX (or enter an amount of your choice, but make sure that it is at least 0.1 gETH) and click Deposit.
Note: Check that the field in the lower right corner reads:** “zkSync Era Goerli”.**
While waiting for the bridging to conclude, finalize the deployment by creating the deployment script.
5. Create a deployer script and export the private key
Next, create a deployer script and export the private key from Metamask, copy the Private Key and deploy the smart contract.
Here is how to do it:
Create a deployer script
Back in VSCode, rename the scripts folder to deploy, and inside, create a file called deploy.ts.
After that, copy the following code into the file:
The comments, marked with “//” explain the logic of the code.
Export the private key from MetaMask
In Metamask, open the wallet that was used during the bridging and export its private key.
Click on the three vertical dots and then on Account details, then Export private key.
Enter the password and copy the revealed string.
Paste the private key and deploy the smart contract
Back in the deploy.ts file, find the following line:
** const wallet = new Wallet("<WALLET-PRIVATE-KEY>");**
Paste the private key in the place of <WALLET-PRIVATE-KEY>.
Make sure that the double quotes are not deleted.
Finally, go to VScode’s terminal and type: npx hardhat deploy-zksync
6. Verify the smart contract via the block explorer
Use zkSync Era’s testnet block explorer to verify the deployed contract.
Go to the block explorer. In the search bar, paste the address of the deployed contract.
Once the contract is found, click on the Contract tab and then Verify Smart Contract.
Then, fill required details:
Contract Name should be “Registry”.
Zksolc version - v1.3.
Solc version - 0.8.17.
Both Zksolc Version and Solc Version could be retrieved from the hardhat.config.ts file.
In the Enter the Solidity Contract Code field, paste the contents of the Registry.sol file.
Click on Verify Smart Contract to finalize the process.
7. Interact with the Deployed Contract on ZkSync Era
In the block explorer, find the contract by its address again and click on the Contract tab.
This time, the block explorer should now show two new fields:
- Read for the getter functions
- Write for the setter functions
Since the personInfo mapping’s visibility is defined as public, a getter method for it is generated automatically.
Make sure that the deployer wallet is connected to the explorer. Click on addPerson.
The section will expand, and two new fields will appear - one to define the name of the person and another one for their age.
After filling in those, click on Write and confirm the transaction.
After the transaction is confirmed, click on personInfo and input the name of the person that was just added.
The GUI should return the age of the person added.
Related Overviews


Build blockchain magic
Alchemy combines the most powerful web3 developer products and tools with resources, community and legendary support.